

learn-stack guide
Add your first source and see the graph
From a URL, a pasted text, a PDF or a book to a concept graph with the evidence quoted.
7 steps · about 3 min. Press → or space to advance; swipe on a phone.
Step 1 of 7
Open Sources
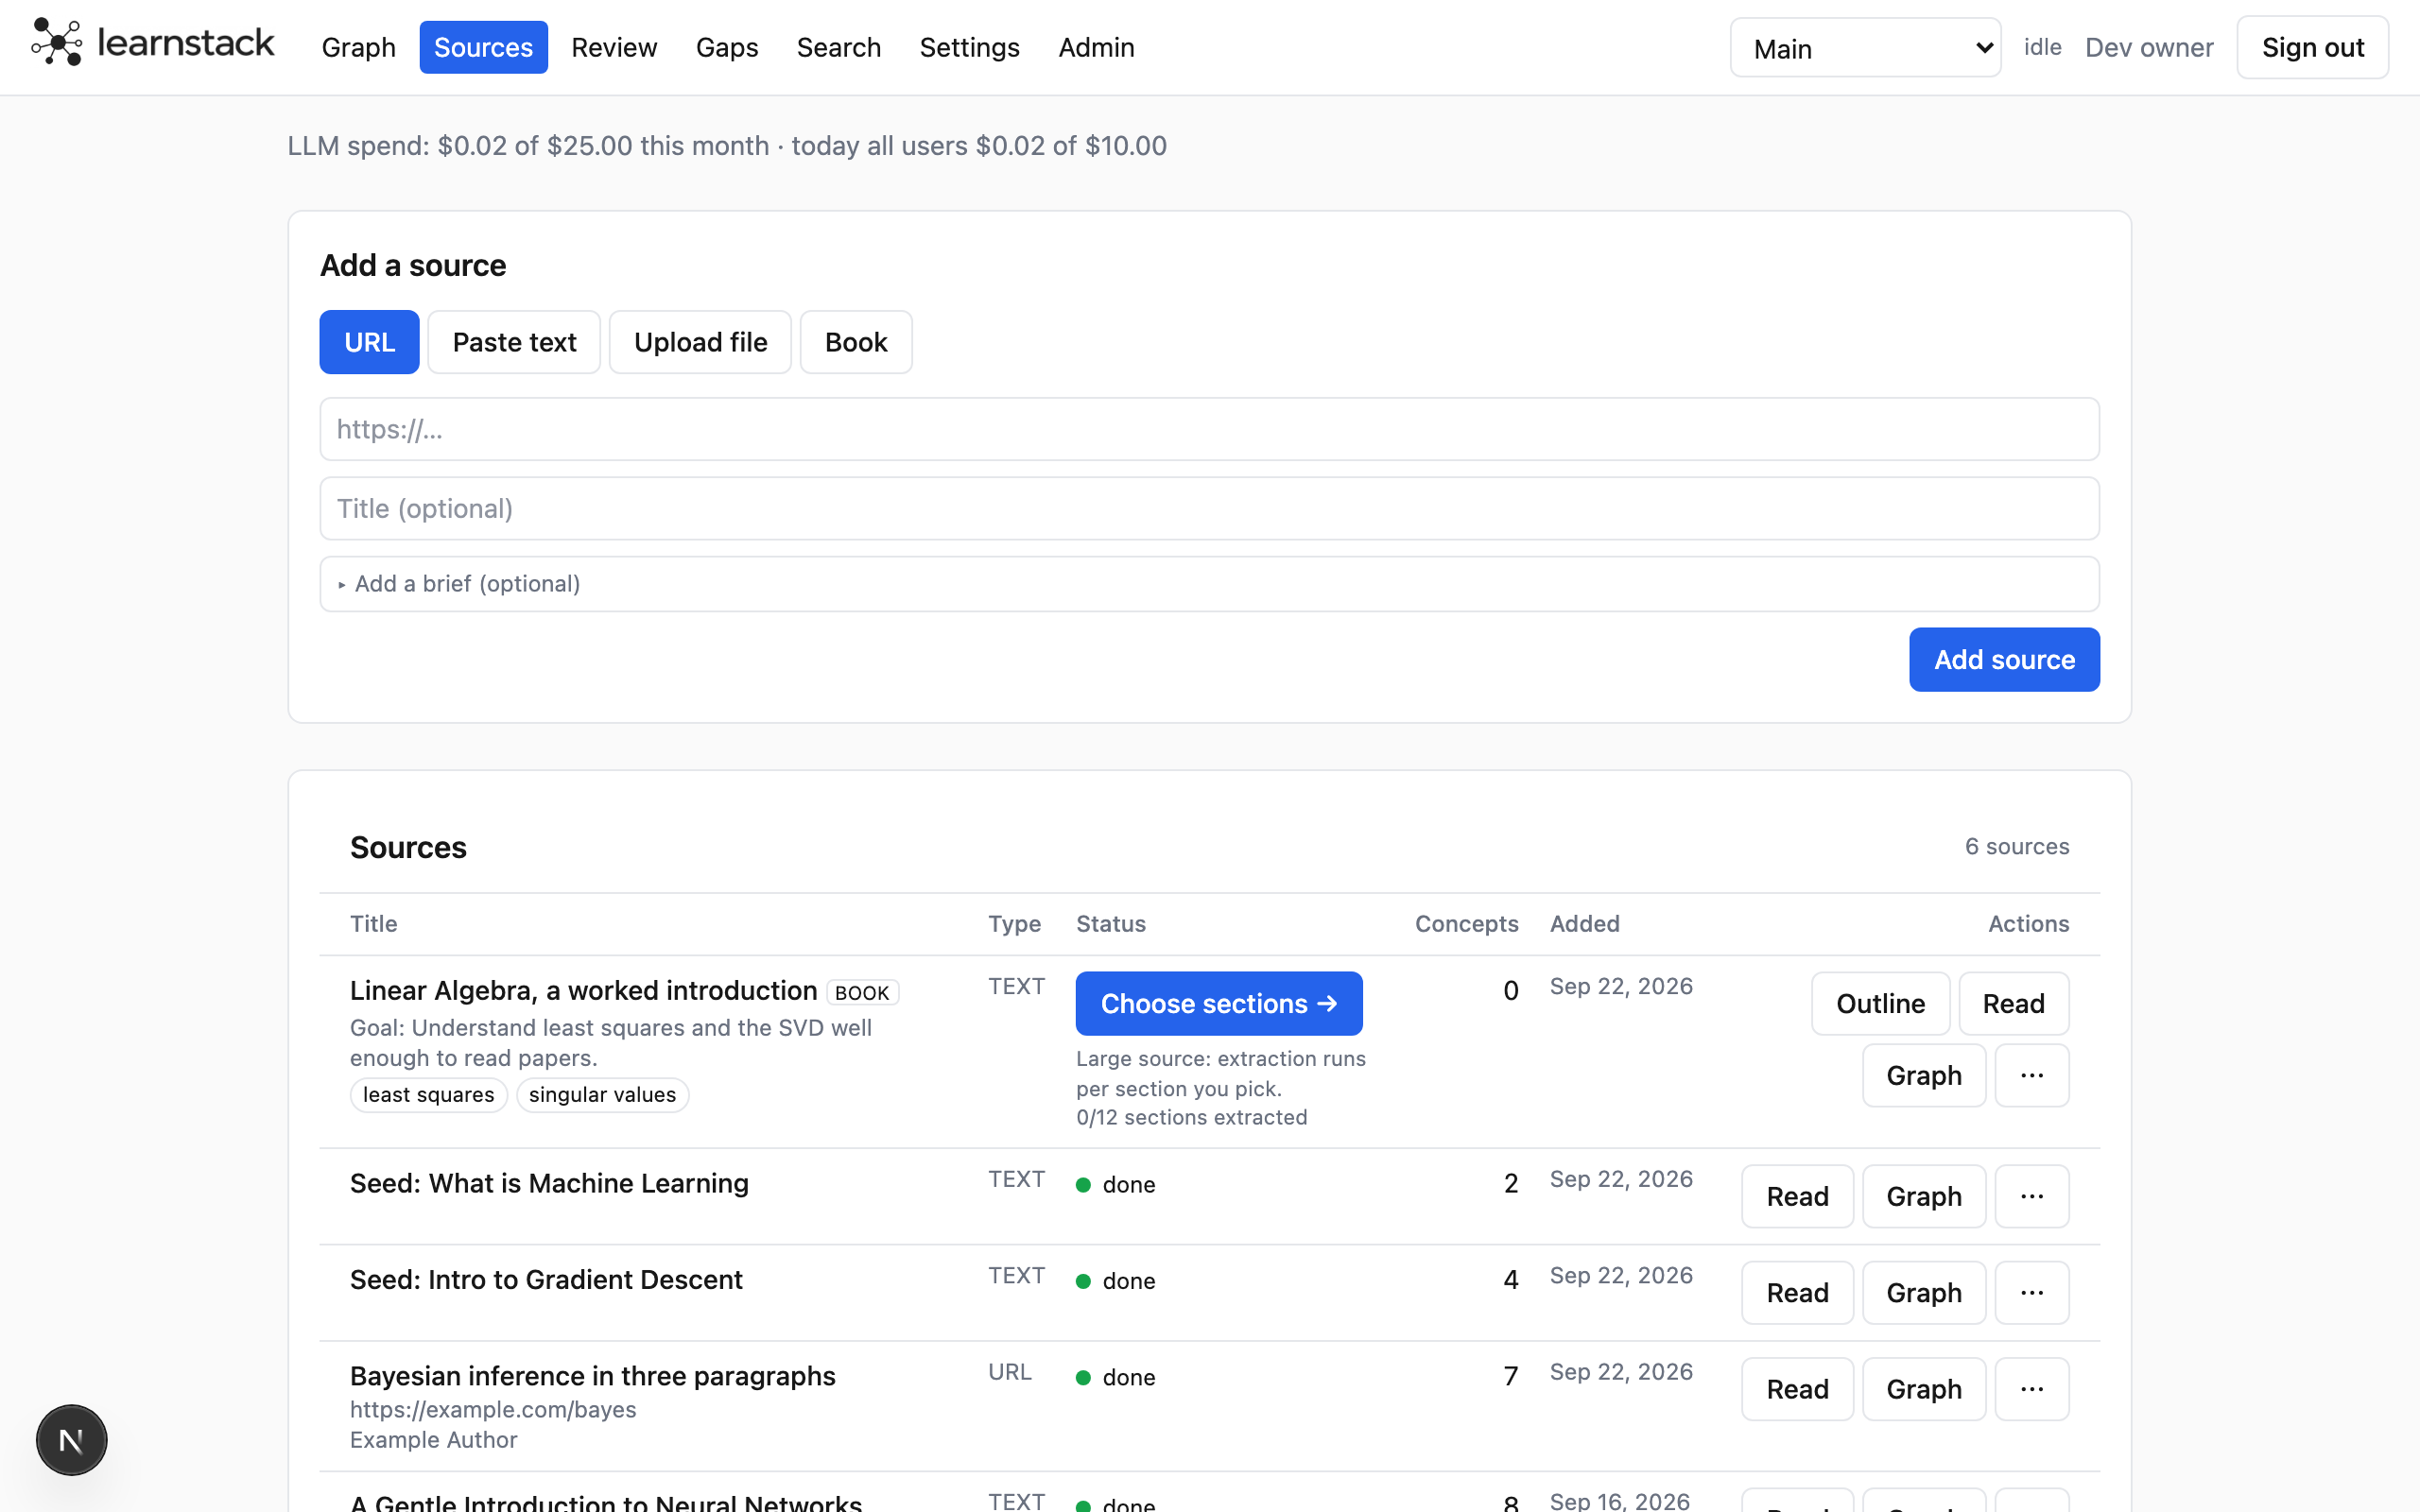
Sources is where everything starts. The Add form at the top takes one source at a time; the table below lists what you have added and where each one is in the pipeline.
Step 2 of 7
Pick how to add it
The four modes cover most of what you read. Whatever you choose, the text is cleaned, split into sections and chunks, and read by the model for concepts.
- URL: the page is fetched and reduced to its article text. Paywalled or bot-blocked pages are detected up front and you can paste the text instead.
- Paste text: a title and the text. Markdown headings become sections.
- Upload file: a PDF (text is read per page) or a .txt / .md file.
- Book: name a book you own. It is researched from the web and summarised; the book itself is never imported and never closes a gap.
Step 3 of 7
Optionally, add a brief
"Add a brief (optional)" tells the extraction what you are after. It is not required, but it makes a long or broad source produce fewer, better concepts.
- Goal: one line on why you are reading this.
- Topics: up to eight terms to look for.
- Anchor concepts: existing concepts the new evidence should attach to.
- Depth: key (just the main ideas), normal, or thorough. For a PDF, a page range narrows the extraction.
You can edit the brief later from the row menu and re-run the source.
Step 4 of 7
Watch the job run
The row shows pending, processing and then done; the indicator in the header shows progress. An article is extracted in one go and its concepts appear in the graph as soon as the job finishes.
- A fetch that fails shows why (blocked, not found, timed out) with a Retry and a "paste text instead" way out.
- Re-run from the row menu redoes the extraction; your notes, cards and highlights stay.
Step 5 of 7
A long source becomes an outline
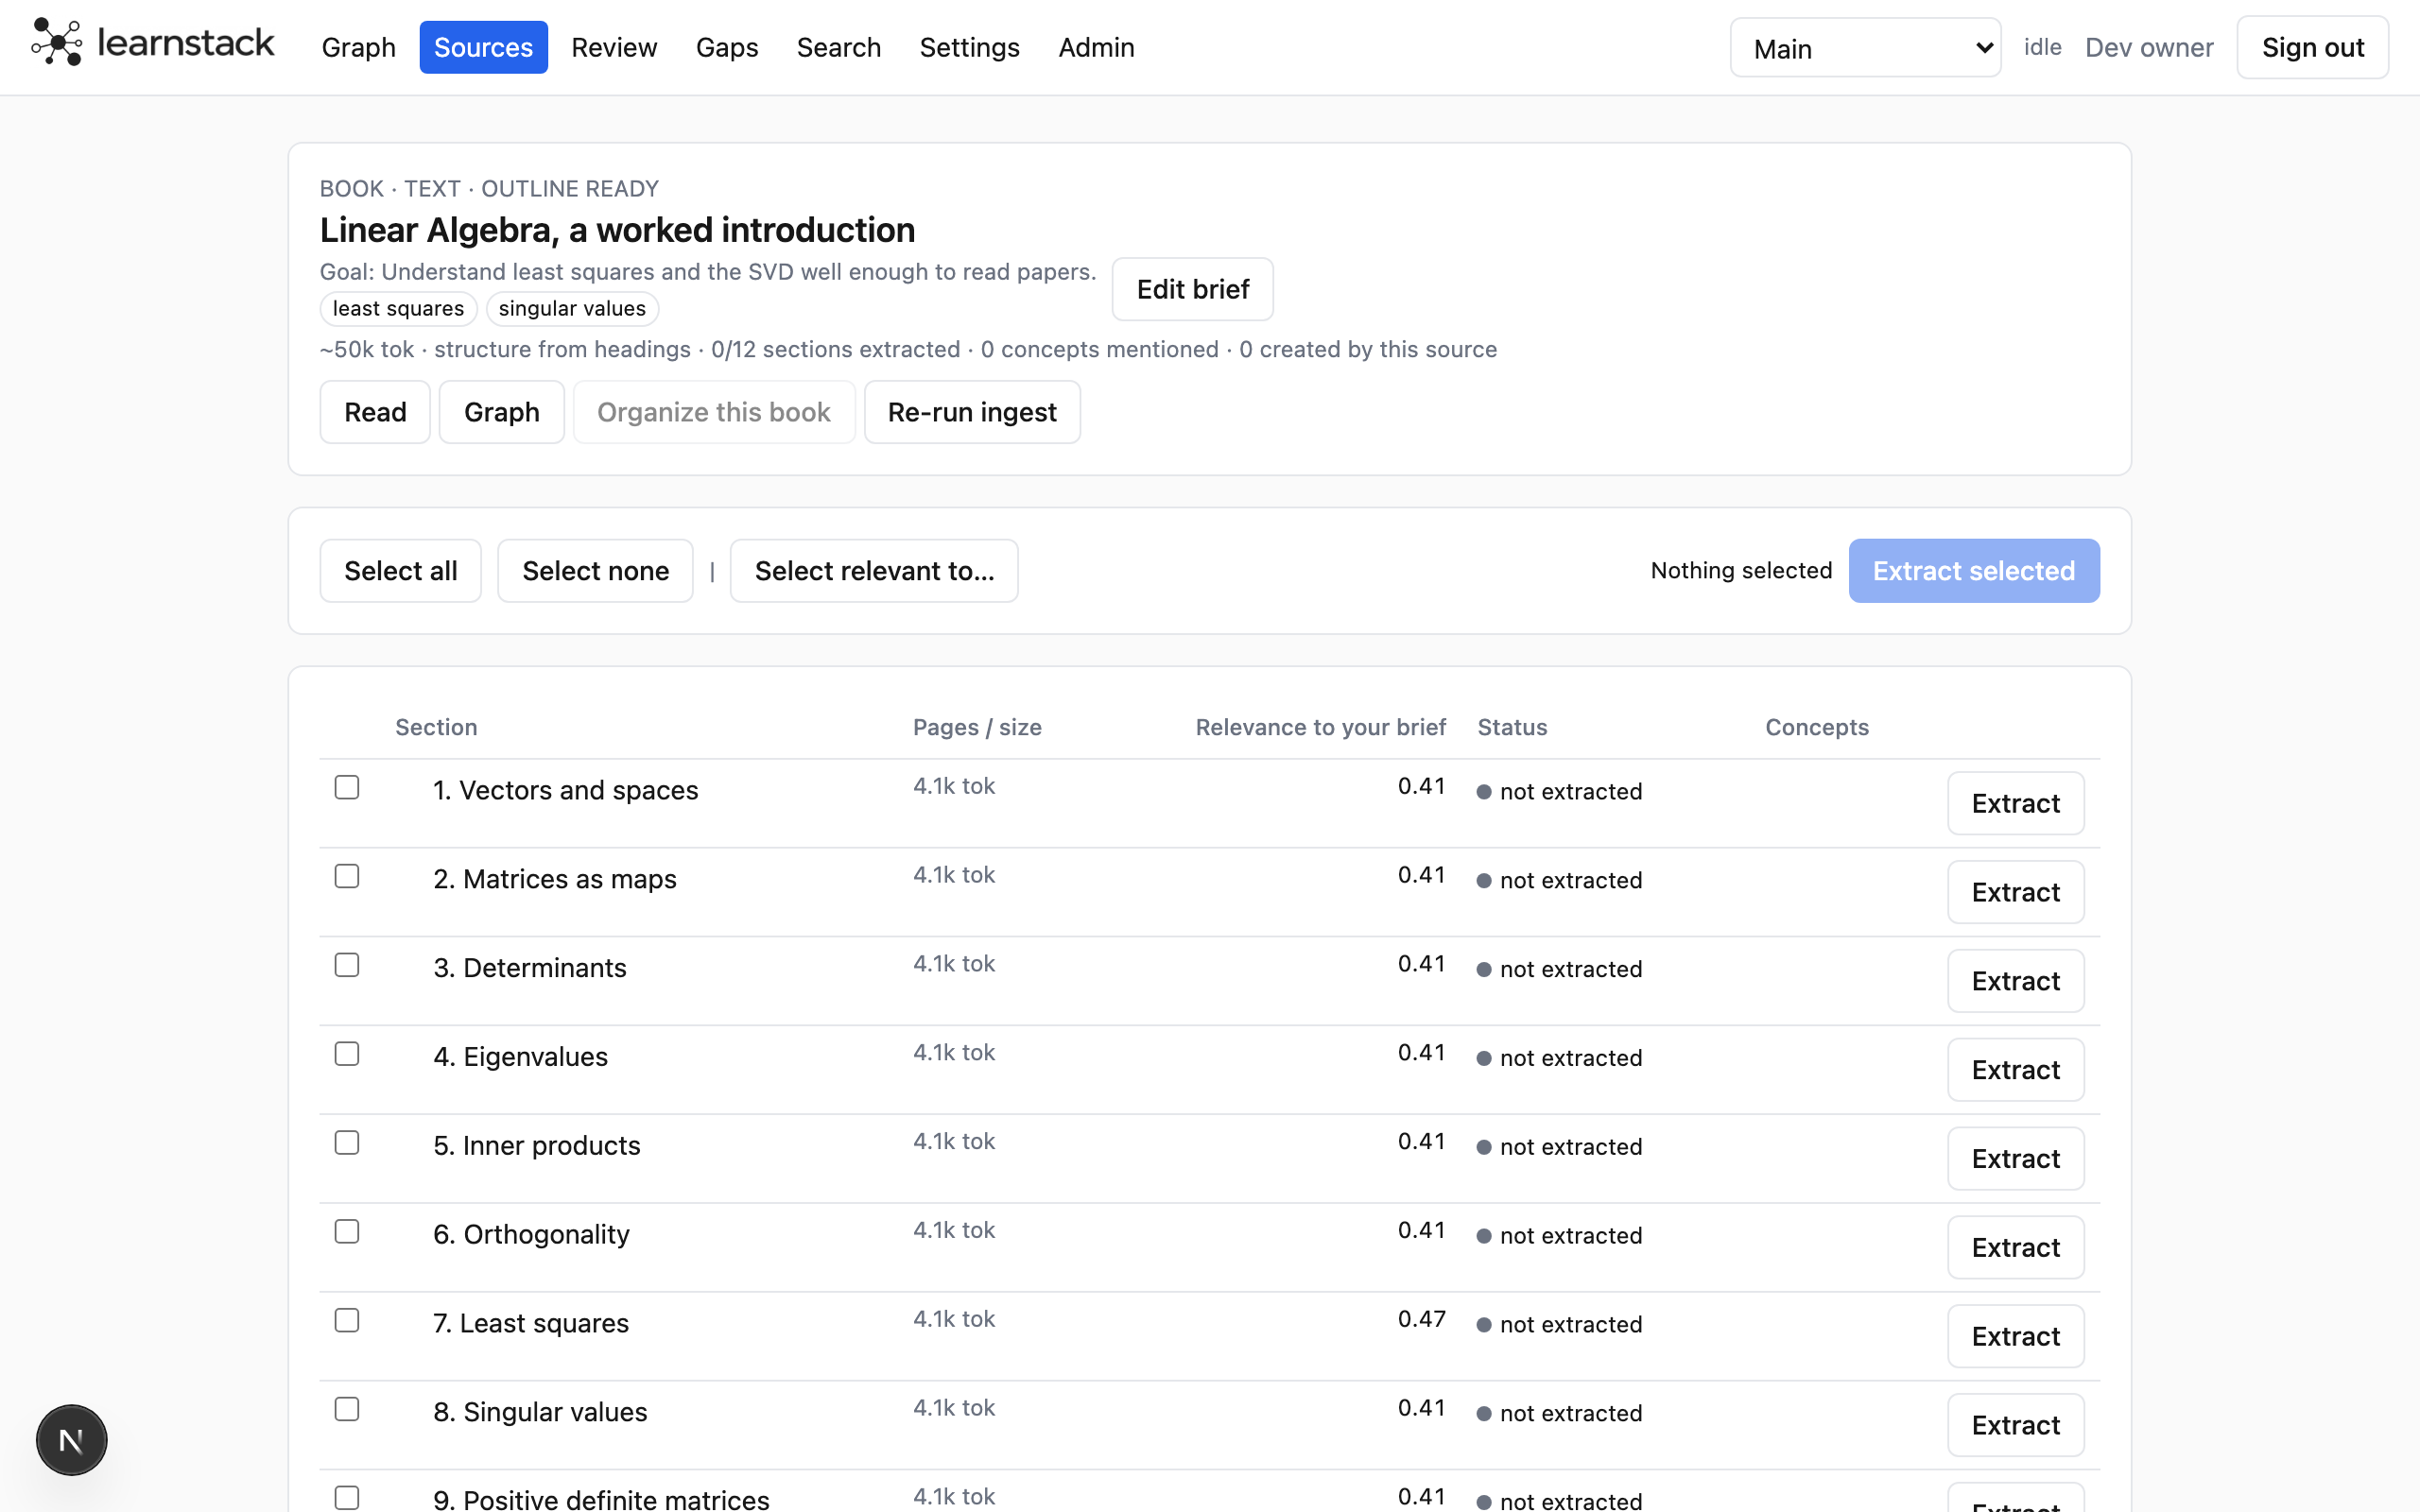
Anything book-sized stops after the outline is built, so you decide what is worth extracting. Open the source to see its sections, tick the ones you want, read the estimate and press Extract selected.
- With a brief or a gap concept the Relevance column ranks sections for you.
- Organize (after two or more extracted sections) adds one or two umbrella concepts that tie the book together.
Step 6 of 7
Open the graph
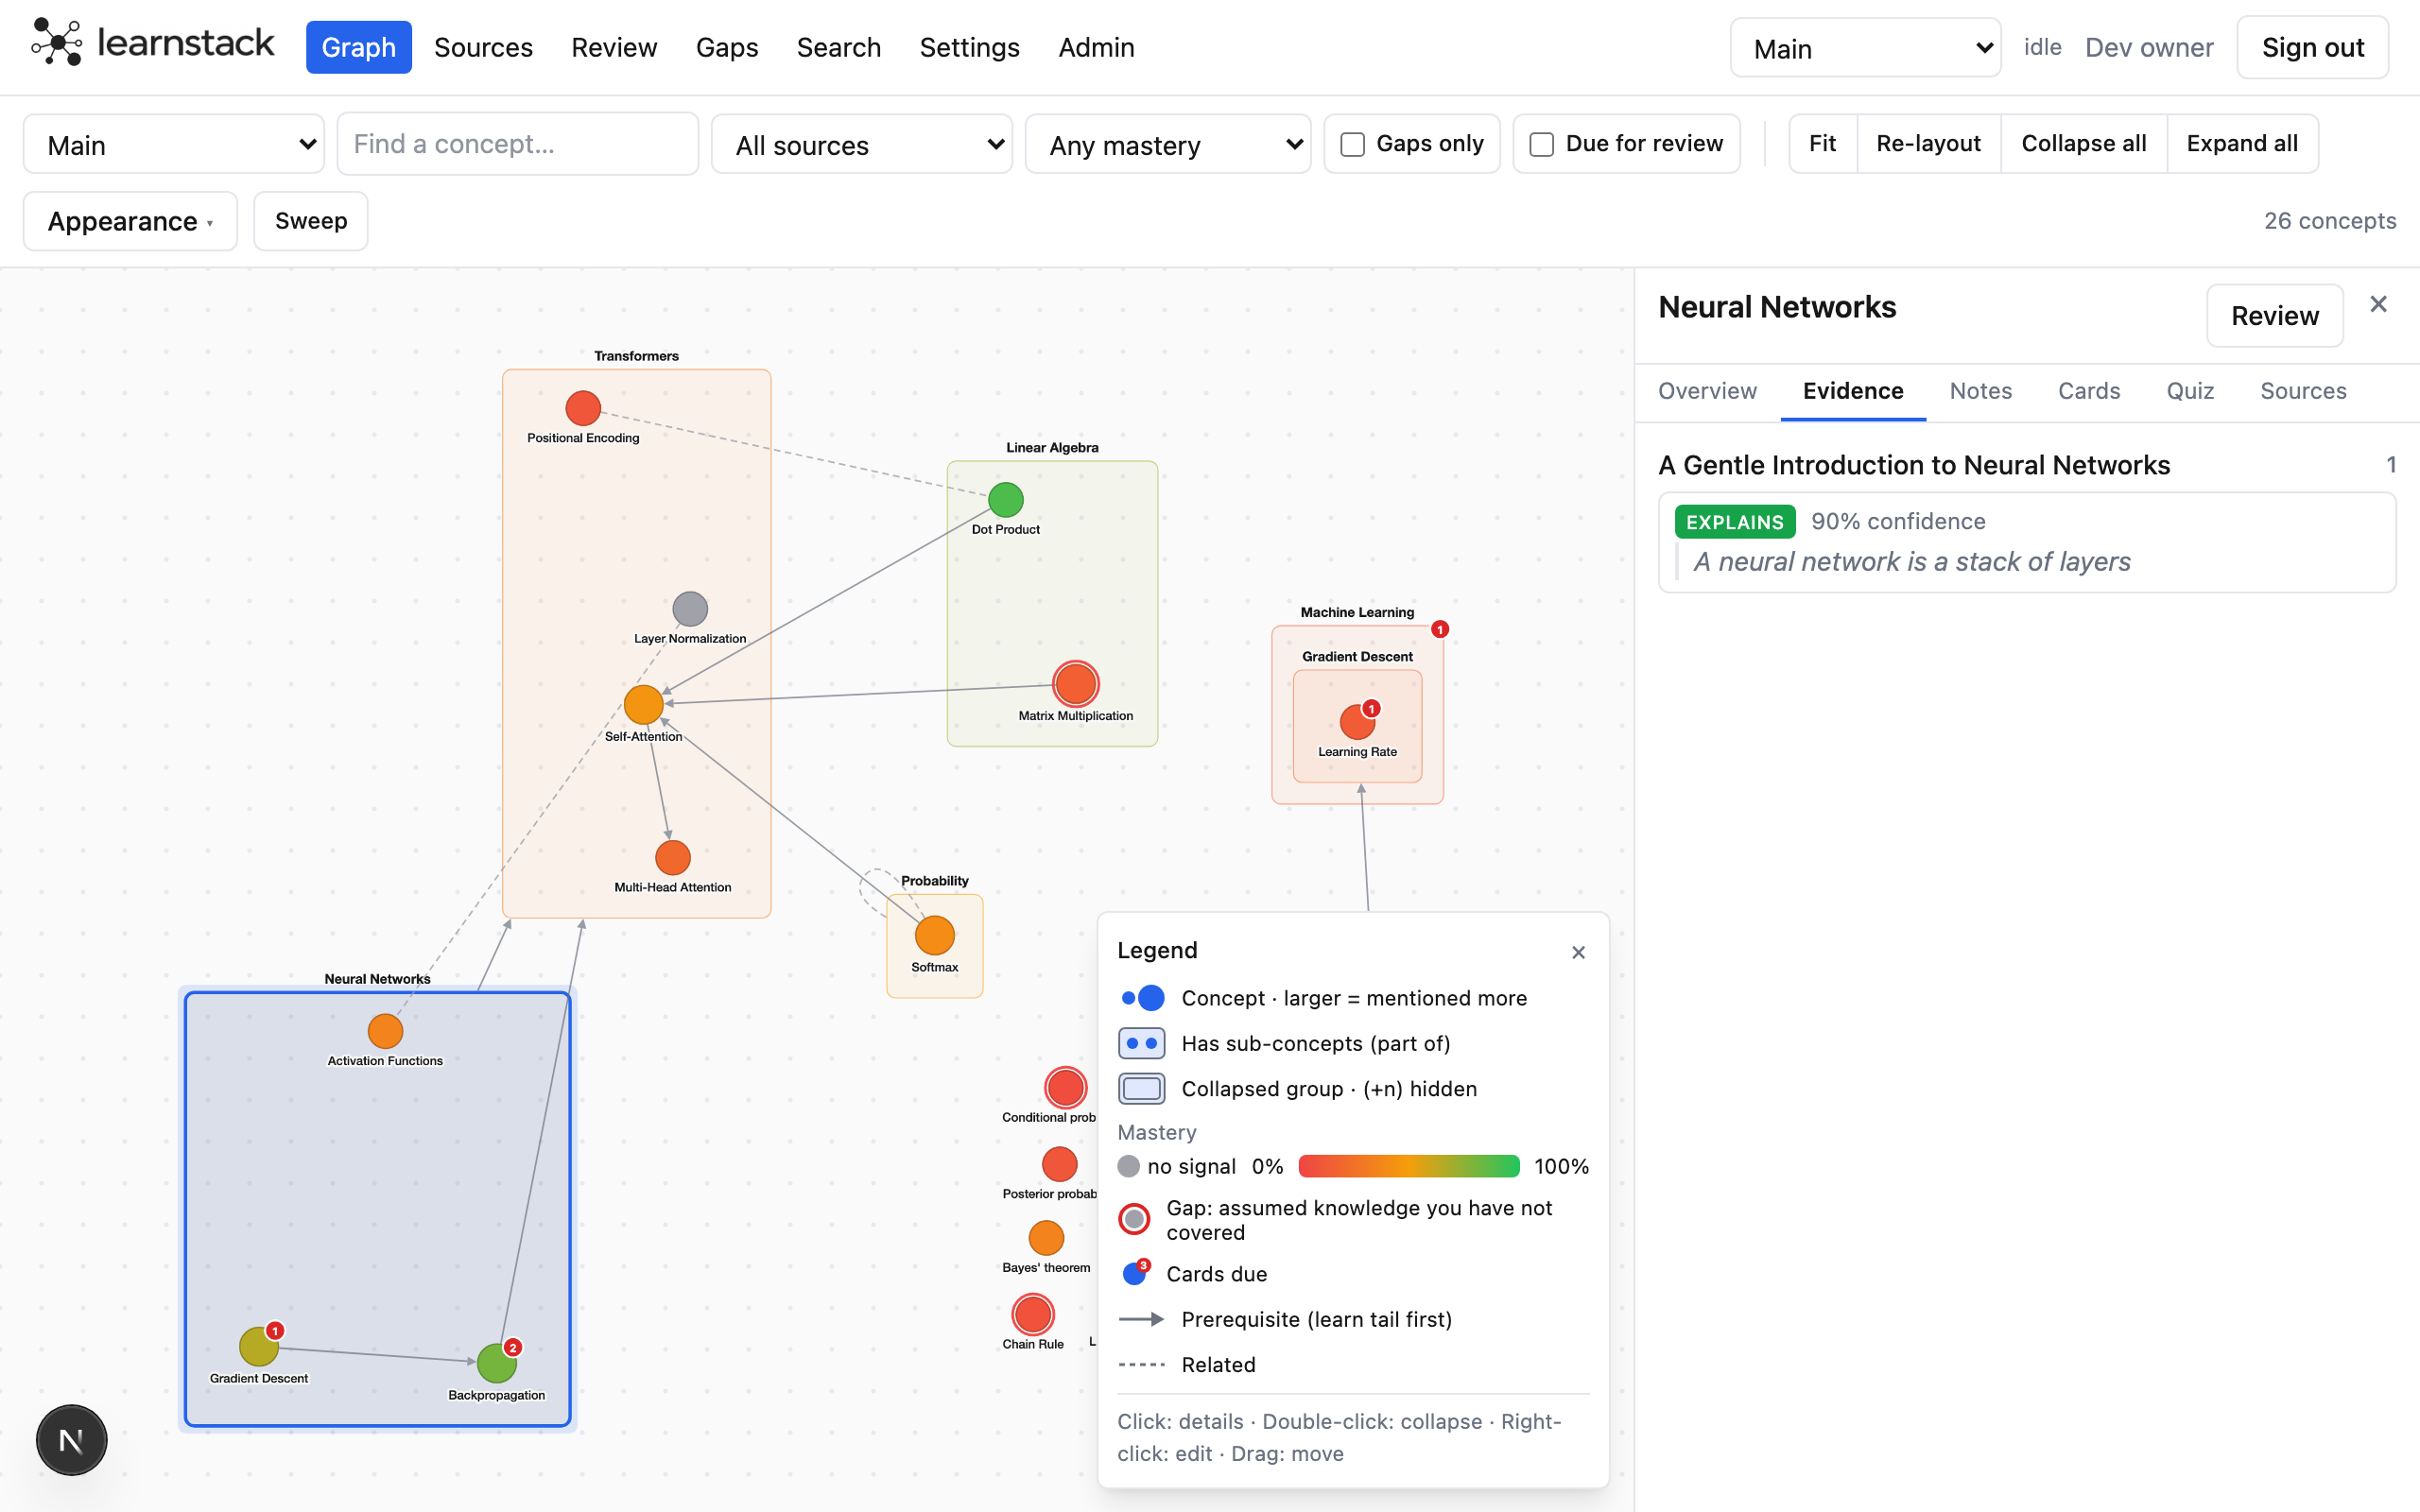
Every concept the source explained is now a node. Nodes sit under their parent topic, colour is how well you know each one (grey means not tested yet), and a red outline marks a gap: something the source assumes but never explains.
- Click a node for its panel: Overview, Evidence (the exact quotes), Notes, Cards, Quiz, Sources.
- Filter the graph to one source from the toolbar, or open it from the source row.
- Scroll to zoom, drag to pan, drag a node to keep it where you put it.
Step 7 of 7
Add the next one
The second source merges into the same graph: a concept that already exists gets more evidence instead of a duplicate, and the model is asked when two names are close. Once you have a few sources, the Sweep page proposes merges and links across them for you to accept or reject.
Next guide: read the source and keep what matters.
That is it